Friday, July 30, 2010

{this moment}


{this moment} - Inspired by Soulemama. In her words: A Friday ritual. A single photo - no words - capturing a moment from the week. A simple, special, extraordinary moment. A moment I want to pause, savor and remember. If you want to participate head over to her blog and enjoy!

Thursday, July 29, 2010

Busy

Sorry for the blog silence, but the last couple weeks have been busy and blogging has taken a back burner. Here are a few pictures of the things that have been keeping us busy. Enjoy!


Friday, July 23, 2010

{this moment}


{this moment} - Inspired by Soulemama. In her words: A Friday ritual. A single photo - no words - capturing a moment from the week. A simple, special, extraordinary moment. A moment I want to pause, savor and remember. If you want to participate head over to her blog and enjoy!

Thursday, July 22, 2010

Easy Fresh Salsa

When it comes to tomatoes "our cup runith over" of late. I love tomatoes as much as the next person, but we have been getting two baskets of tomatoes from our CSA for more weeks than I can remember now. These are great sauted with squash and some onion and served over pasta. I love them eaten fresh both in salad and on their own. However, there is a limit to everything. If I had more I would can them, but we never get enough at one time to fire up the canning pot. Then I saw the post on Food in Jars about making homemade salsa. We had a big bag of chips to go with our summer favorite of tomatillo salsa so this pico de gallo is perfect, or would be if I had all the ingredients. Since necessity is the mother of invention I fit the recipe to work with what I had on hand. Here's what worked for me:

I used:
1 pint of tomatoes (this is how our CSA tomatoes come, just visualize how many would fit in a pint basket)
1/2 a small onion
1 small handful of cilantro (in a real pinch fresh parsley could be used)
salt and pepper to taste
lemon juice
Chop up each ingredient and put it into a wide mouth quart jar. Once everything is in there put on the lid and shake it to mix everything together. Let it stand in the fridge for a few hours for the flavors to meld (or as long as you can stand if a few hours are out of the question). Enjoy!
A few notes. You may have noticed that I didn't add any sort of chilies. I like my pico de gallo to be really mild, if you don't you might want to finely chop a chili like a serrano or a jalapeno and add it depending on what you like. This is especially important if you use parsley either because that is what you have on hand or because you are one of the unfortunate souls for whom cilantro tastes like metalic soap. Also, I used lemon juice because that's what I had, if you have it lime juice would work better. Finally, I didn't add garlic because we'd just run out. If you have garlic you might want to add that too.

Try making this salsa, it is a quick, easy and tasty way to use up some off those overly abundant summer tomatoes. The best part is that as long as you don't go crazy with the chips it is pretty healthy too since it has no fat and is just fresh veggies. It is also cheap because it uses foods that are frequently in season at the same time and is a great alternative to store bought salsa.

This recipe is linked to Pennywise Platter at The Nourishing Gourmet. Head over there to check out other great recipes.

Wednesday, July 21, 2010

Felted Balls

I just realized that I haven't been talking much about where I find specific projects, just how neat they are to do so I wanted to start talking specifics. If my post on Monday inspired you to make toys, but you don't know where to start these balls are a good place. (Thanks to Micha for the idea.) They don't need much in the way of specialized equipment and you don't even need to know how to thread a needle which means children can help. They are great toys for babies, children, cats and dogs (as long as none of them have destructive tendencies). You can make them any color or combination of colors you choose and you can make them any size. These ones are just the right size for little hands to pick up and squish and the basic ball can be made in about 30 minutes, though it will take a couple of days to dry when you are done. I want to make these in every color of the rainbow.
What you need:
dish soap
hot water
sink or large bowl
1/2 oz. - 1 oz. wool roving

Put 1-2 tsp. of dish soap in the sink and put about 4-5 " of the hottest water your hands can stand. While the sink is filling take your wool and form it into a ball (roving can be easily rolled up like a yarn ball) about 130%-150% the size you want the finished ball to be. Once the sink is full put your hands around the wool and put it into the water and start gently squishing the wool to get it fully wet and then pull it out and mush the fibers together. You will want to be careful to keep it as ball shaped as possible. Don't squeeze too tightly at first or you can get lumps that will be a pain later. As the ball starts compacting down you can squeeze a little harder. Once it starts feeling more like a ball and less like a pile of fluff you can start rolling it around in your hands, pausing every minute or so to re-dunk it in the hot, soapy water. If your water starts getting cool you may want to pour some boiling water in to keep the temperature up. The hotter the water the faster the ball will felt (which is why you don't wash wool in hot water). Keep rolling until you have a firm outside, the middle may be firm too, but it will depend on how hard you squished the wool in the very beginning. Once the ball is to your liking rinse it under cold water, squeezing all the soap out and reshape it. Then put it on a sunny windowsill until it is dry. The texture and colors are interesting for babies and it is soft enough that you can throw it around without hurting anything. They are a hit at our house.
Let me guess, now you are interested in the project, but don't know what I am talking about when I say "wool roving", right? Don't worry, unless you are a spinner or know one (or know enough about felting that you didn't need this tutorial) there is no reason you would have dealt with roving before. Basically roving is fiber that has been carded and prepared for spinning. Since hand spinning and felting have become popular many large cities will have at least one or two places that you can buy it. Look for a spinning shop or start calling local yarn stores and asking them if they know where you can buy fiber. If that doesn't work there are a ton of places you can find stuff on the Internet. Two that I like are A Child's Dream Come True has "Eco Wool Batting" in their doll making section which is cheap and can be wadded up and used in place of roving as well as roving for felting. Also Halcyon Yarn has a whole section of felting fiber. There are a ton of other places out there, these are just two I know of. If you have time to kill I'm sure you can find more via Google.

If you have any questions please ask and if you'd like to see more instructions like this please let me know. Also, if there are any projects or items pictured that you'd like to see instructions for let me know that too. Thanks.

Tuesday, July 20, 2010

Milestones aka. Growing-up Too Fast

Almost a week ago now A. started crawling. This milestone felt like it took forever to get here, not because she was behind, but because she had been "army crawling" for a couple of months before this and showed no signs of ever wanting to crawl properly. I had given up on expecting her to ever crawl normally as she was getting around well enough and was starting to really pull-up and cruise. After all, why crawl when you can walk? Every once in a while she would get up on her hands and knees and go a couple of feet, but then she'd drop down on her belly and take off. Her doctor wasn't worried so I decided not be either and had gotten used to my army crawling girl. Then one day my world changed. I woke up and she was crawling. (Quite literally, she'd been playing with my husband when she started crawling and I was still in bed getting a few extra minutes of sleep.) I was really proud of her and tried hard not to focus on how much more of a big girl she looks like.

Then over the weekend we attempted another new thing. We never did buy a baby bathtub and when she was tiny we just bathed her in the kitchen sink. By the time she outgrew the sink she could sit up reasonably well, but wasn't stable enough to be trusted in the tub on her own so I would get in the bathtub with her. She could sit and play while holding onto my legs and it was a great way for us both to get clean. At this point it has been a while since she has needed to grab onto me and she is quite comfortable in the water so we decided to let her try being in there on her own (with close supervision of course). She loved having the extra space to play with her boat and we now have a new bath-time routine.

If all this growing up wasn't enough yesterday afternoon I got confirmation that her recent crankiness is the result of teething. Her first tooth is now poking through her gums! At 9.5 months it's about time and having a tooth will let her eat some things that she hasn't been able to handle yet. I am happy for her and jumped for joy when I felt that tiny tooth, but at the same time all these things happening at once make me feel like I'm loosing my baby. I am loving watching her grow up, but I miss the tiny baby that I cuddled in my arms for so many months. That said, I am loving the little girl she is becoming.

Monday, July 19, 2010

Sewing For Baby, Part 4: Toys

There are so many baby toys on the shelves that you might wonder if it really makes sense to make your own. After all, you can buy plastic toys that are brightly colored and light up and ones that talk. Or you can go the more natural approach and buy toys that are hand crafted from wood by family owned businesses. Some people (myself included) have a worry in the back of their minds about toys produced in China containing lead or other harmful toxins. However, I can buy toys produced in Germany under good working conditions and strict quality control standards. So why would I bother making toys?

There are many answers to this question, but the one that springs to my mind first is "tradition". When I was a kid my granddad made my sister and I cars for our Barbies out of wood, empty shoe polish tins and old lids. My mom made us dinosaurs out of scraps leftover from various projects and remnants (I'm assuming). My dad helped me make a swing in the back yard and let my sister and I build things with scrap wood. One of my earliest memories of my mom sewing was when she was working on a larger version of the ball you see to the left. The ball was probably about 6" across and belonged to my little sister. It had some of the neatest fabrics, various scraps that went together to make a pleasing whole. As a kid I always thought this ball was really neat, not just because it was neat in and of itself, but because my mom was clever enough to make it. I would love it for my children to remember me that way.

This alludes to a second reason to make toys for your children. Even the simplest toys are special when they are made with love. Add a dose of creative play and special memories are created. Even a simple gauze swaddle blanket, made at home because Target didn't have them for sale when we needed them, can become a fun toy. We use ours to play peek-a-boo, build forts, provide shade and act silly. I can only imagine how much more fun we will have as my daughter gets older and starts playing pretend. The best part is that since I made it myself I was able to pick colors like coral, melon and kelly green that are so saturated that they are fun in and of themselves. I love that they things that I make to fill my need to be creative can help my daughter fill hers.

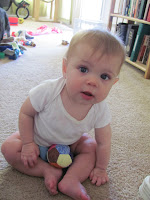
Another reason to make your own toys is that you can make something that can't be found in stores. My daughter is small for her age which means she has small hands. When she reached the stage where she wanted to grab, hold and toss toys they were all too big for her hands. I found a pattern for this puzzle ball in Last-Minute Patchwork and Quilted Gifts and realized it fit the bill perfectly. I checked out a copy from the library and was able to use the instructions and scraps from old projects to make this ball for free. The ball is big enough to have some real substance, while still having surfaces that can be grabbed with small hands. Add to that the bright colors (or make it in black and white for a young baby) and it is a real hit.

The final reason to make your own toys is, obviously, cost. Good toys are expensive and even cheap toys add up quickly. While I definately try to limit the number of toys my daughter has and only offer a few at a time so that they stay interesting and engaging, the cost still adds up. Given a choice I would rather she play with sturdy toys that aren't going to break. Toys that are not made in sweat shops, but instead giving what money I do spend to companies that treat their workers with respect and provide them with a living wage and safe working conditions. I want toys that are made by someone who cares, not by the lowest bidder. These toys cost more and for good reason. Unfortunately, I can only afford so many and my daughter does need enough to keep her entertained and stimulated. I don't want her to feel that she has to sacrifice because of my ideals so I make up the difference as best I can and she seems to like the arrangement. If she seems to be really drawn to a given fabric I use some in a toy that she can play with. I focus on how special each individual toy is instead of on how many she has or doesn't have. This is the balance that works for us. What about you? What kind of toys do you buy for your babies and children? Do you think about the impact that those toys have or how your child will receive them? Do you try to teach lessons through play or do you feel it is better to let your child discover them on their own? I'd love to hear the thoughts of anyone who has time to answer.