Showing posts with label dairy free. Show all posts

Sunday, February 13, 2011

Naan

I'll never forget the first time I had Indian food. I was home from college and my sister decided to drag me out for a girls night with her friends. I was a little worried because Indian food seemed so strange, but I'd had a roommate who'd loved it and my sister tends to have good taste so I figured it was worth a shot. The place we went had two menus, the one in English with descriptions of what each dish was and prices in the $6-$10 range and the one that wasn't in English with prices in the $4-$6 range. I ordered off the second menu and loved the food (though I still don't know exactly what it was I got), especially the naan that came with it.

I always figured naan was one of those specialty breads that was just too hard to make at home and would occasionally buy some from Trader Joe's. Then, while mindlessly watching PBS while attempting to knit a lace shawl Baking With Julia came on and the episode was all about how to make naan. I grabbed the post-it notes and pen from by the phone and wrote frantically. Now when I want Indian food and am feeling kinda lazy on the cooking front I'll make up a batch of naan along with the premade entrees from Trader Joe's and some rice. I rarely remember to do this, but on Friday my sister mentioned that she was making Indian food, but that she'd yet to find a good naan recipe so I emailed her this one. She agreed, it's perfect. Since that conversation I have been craving some myself so today I made a batch. If you want to make a batch too I've included the recipe below.

Naan:
2T. Active Dry Yeast
2 1/2c. Warm Water
Flour, lots of it

Put yeast in a large bowl, add the warm water and stir them together. Slowly add flour (first stirring and then kneading) until it forms a soft, slightly sticky dough. Put the dough in a lightly oiled bowl, cover with a damp cloth and let it rise until it has doubled in size. Put a pizza stone in the oven and preheat it to 500F*. Punch it down, knead it a bit on a heavily floured counter and divide into 4 pieces. Divide each quarter into 4 pieces and knead them a bit more and then roll them into flat, rounds about 1/4" thick. Stab it all over with a fork to keep it from rising up in the oven (this is the main difference between naan and pita bread), sprinkle with water and then add toppings. The original recipe called for salt, green onion and caraway seed. I like garlic salt or onion salt, I'm told that traditionally ghee (or clarified butter) is used too. Put the rounds on your preheated pizza stone and bake for 6 minutes. Enjoy!

I generally do 2-4 at a time because that is what fits on my stone. There is then plenty of time to prep the next ones while those bake.

*Make sure your pizza stone is rated to at least 500F, many are only rated to 400 or 450 and may explode when you put wet dough on them. I think that this is the one I have after I exploded the last one.

ETA: This is now linked to the Tasty Tuesday Parade of Foods at Balancing Beauty and Bedlam. Check it out for lots of tasty recipes.

Sunday, December 5, 2010

Pan-fried Fish

I love fish, but I've always been rather intimidated by the thought of cooking it myself. This is probably because I didn't grow up seeing it cooked combined with a few spectacular failures early on. Even the times that I considered my efforts a success DH didn't like it so I had pretty much given up and left fish to the professionals. Then yesterday I was at Trader Joe's and noticed some frozen tilapia fillets that seemed to be calling to me. I was really in a fish mood so I picked them up and decided to experiment. I "followed" (meaning I only changed half of it) one of the recipes on the package and did the same for a tarter sauce recipe I found online and wound up with an amazingly fast and tasty meal. DH was so impressed by the end product that I'm not entirely sure he hasn't been replaced by aliens, but I'll take my victories where I can find them and have decided to write it down before I forget what I did. Here goes:

You need:
White Fish Fillets (I used tilapia)
Flour
Lemon-Pepper
Garlic Powder
Salt
Vegetable Oil

Put 1/2c-1c flour in a pie plate and add a bunch of lemon-pepper along with a dash of garlic powder and a pinch of salt. Mix it all together with a fork. How much lemon-pepper you add depends on how much flour you add, you are trying to get to where the flour is nicely speckled with the pepper once it has all been mixed up. Rinse the fish off and if you have giant pieces like I did you might consider cutting them into more manageable pieces. (I did this on accident, it was frozen and I broke the fillets trying to get them apart. One of the fillets remained intact and I cooked it that way, but we liked the smaller pieces better.) Put enough oil in a frying pan to just cover the bottom and start heating it up over medium-high heat while you dredge the wet fish in the flour mixture. Be sure to cover the fish well and then shake off the excess flour. Once the oil is hot put the fish pieces in the oil and cook for 3 minutes, flip and cook for 3-4 more minutes until the middle is firm and white and it flakes easily with a fork. You will have to poke it with a fork to tell though, because the breading holds it together. At this point the outside should be a nice golden brown, if it isn't turn up the heat a touch next time. If you are working in batches because your pan is too small then line a plate or platter with a paper towel and put them in a warm oven. The paper towel will help keep them from getting soggy while they wait and will also let you see how little oil was absorbed by the thin breading so you feel better about eating fried fish.

For the Tarter Sauce:
Mayo
Lemon Juice
Dill

Take 2-3 tablespoons of the mayo and add a splash of lemon juice and mix it up until it has the consistency that you want. If it is too thin add more mayo, too thick add more lemon juice. Sprinkle in the dill until you have an attractively flecked sauce. Double check that it tastes the way you want and adjust the seasoning to suit.

Serve the fish with some tarter sauce on the side. If you add couscous and some frozen veggies cooked in the microwave you can have a tasty, healthy dinner in less than 15 minutes and all of the ingredients can be stored in either the freezer or the pantry so you have them on hand for those busy evenings.

Sunday, September 19, 2010

Sandwich Cookies of Awesome

I made these cookies for a bridal shower I hosted yesterday and they were a huge hit. This is based on the Raspberry Sandwich Cookie recipe from The Ultimate Cookie Book, which I found in the bargain books section of Barnes and Noble many years ago. I don't have a picture of these because they were such a hit that they were all gone before I got one. Many of the guests took a couple home with them and I am hoping one of them will send me a picture to share. A kind guest sent me a picture of the last remaining cookies taken immediately before eating them, aren't they pretty? If you want to make your own here you go.

You need:
1 cup raw almonds (or roasted, unsalted should work too)
1 1/2c flour
3/4 c butter
1/2 sugar
lemon zest from one lemon (a good use for that microplane)
1 tsp. vanilla extract
raw sugar
strawberry lemonade jam (the original recipe calls for raspberry jam you mix with a little lemon juice if you don't have the strawberry lemonade jam)

Finely chop the almonds and 3 tablespoons of flour in a food processor. The finer you do this the smoother your dough will be and the easier it will be to cut out the cookies later. Cream together the butter and sugar in an electric mixer and then add the lemon zest and vanilla. Add the almond mixture and the flour to make a dough. Wrap the dough in waxed paper or plastic wrap and chill it for at least an hour (I refrigerated the dough for more like 10 hours because I was busy and it was still fine). Preheat the oven to 325F and line two cookie sheets with waxed paper or baking mats. Roll your dough out on a floured surface (I had to knead it a bit to before it would hold together well enough to roll) until it is 1/8" - 1/4" thick. (I did this with 1/4 of the dough at a time which I found made it easier to manage.) Cut out an even number of circles (or other basic shape) and use a smaller cookie cutter or a thimble/funnel/piping nozzle to cut the middles out of half of those. Sprinkle the tops of the "o" shaped cookies with raw sugar and bake 12-15 minutes until they are lightly browned. Let them stay on the cookie sheet for a couple of minutes after you pull them out to firm up before moving them to a cooling rack. Once the cookies are totally cool pair up the tops and bottoms and lay them down on the rack open ready for jam, you'll want the side of the cookies that was down during baking to be the insides off the cookies. Put some jam (I think I used about 4oz) into a custard cup or a small heat-proof bowl and microwave it on high for about 30 seconds or until it is melted (watch it and if it starts bubbling stop it immediately). Spread a heaping teaspoon of jam onto the bottom of each sandwich, place the top half and give it a good wiggle to settle everything in. Once the jam cools again and sets you will have pretty cookies that are ready to serve. The only thing to remember is that the firmer the jam the less messy the cookies will be. I want to say this recipe made around 2 dozen cookies. I made them a day ahead and they stored well in an air-tight container overnight. However, once I put them out for people to try they didn't last very long. These are a tasty, fancy looking cookie that is great for parties or a special treat for your loved ones.

Strawberry Lemonade Jam (No Pectin)

This recipe was inspired by some strawberry lemonade concentrate I made last summer. After the first batch (or was it the second batch?) my husband was licking the pot and commented that the lemonade down at the bottom had gelled and wouldn't this make great jam? Since strawberries were still crazy cheap and plentiful at the time I bought more and we made another batch of lemonade, but this time after pulling out a quart of concentrate for our own enjoyment we kept boiling it down until it reached the jelly point (215-220F with the higher number getting you a firmer jam/jelly). We then poured the jam into jelly jars and processed them for 15 minutes (if you are near sea level process for 10 minutes, mine is adjusted for my altitude). The resulting jam was very firm, but quite tasty. I meant to post this recipe last summer when strawberries were crazy cheap, but I never got around to it. Honestly, I'd mostly forgotten about it until I used some of the jam for cookies yesterday (for a friend's bridal shower, more on that later) and they were such a hit that I was woken up this morning by a phone call asking for the recipe. I will post the cookie recipe separately, but since I feel that this jam is what made the cookies I wanted to post this recipe too. This description should be enough to get you started, but if you want a proper recipe here goes:

You need:
6c chopped strawberries (you don't need to get them finely chopped or anything, just like you would for eating on ice cream)
4 c lemon juice (every recipe I've seen says that you MUST use fresh squeezed, but I used bottled lemon juice and it turned out just fine)
6 c sugar
a candy thermometer
jam-making set-up (click here for basic jam making instructions)

Puree the strawberries in a food processor and then put them in a giant, non-reactive pot. Add the lemon juice and sugar. Attach a candy thermometer to the side of the pot so that bottom is definitely in the liquid, but nowhere near touching the bottom (touching the bottom has caused more than one broken thermometer in this household). Heat it over medium-high while stirring constantly. If you want strawberry lemonade concentrate turn off the heat and ladle some if the liquid into jars when you reach 190. (I highly recommend this because it is tasty lemonade.) Keep boiling until you reach the jelly point, 215F for a soft jelly or 220F for a firm jelly (for cookies the firmer jelly is good because it means that the jam stays on the cookies without falling off onto someone's pretty dress, but if you are mostly planning to eat it on toast go for the lower temperature.) Once you reach your desired temperature, take it off the heat, give it a good stir for a minute or so and then ladle it into your jars and process it (10 minutes at or near sea-level, adjust accordingly for elevation). Enjoy your jam in a PB&J or in cookies!

Thursday, September 9, 2010

Maple, Date, Walnut Granola

DH and I love granola. We'll eat it with yogurt and fruit, with milk or even plain as a snack. It may not be low in fat, but it is healthy and filling and a little bit of fat is really important. The only problem with granola is that it tends to be really expensive. I've been hearing for years about how you can make your own granola, but all the recipes I have seen included a ton of ingredients I didn't have and seemed to involve a lot of steps and mess. It just never seemed worth it. Then I came across this. It described a simple, basic granola that you made in a skillet. I was hungry and really wanted a snack, but didn't know what to make when I found the recipe. I did a more basic version using flax seeds (which was what we had on hand) and honey that was somewhere between that recipe and the original. (I used 2T. butter, 2T local honey, 1c. rolled oats, 1/4c. flax seed and a dash of cinnamon if you are interested.) It was amazing, and what's more it only took 5-10 minutes. It was so good I started to experiment with what I had in the pantry and came up with a new recipe. It only took a few minutes and was super tasty. If you want to try it, here is the recipe. It is easy, tasty, cheap and healthy. What's not to love?

Maple, Date, Walnut Granola
1 c old-fashioned rolled oats
1/4 c chopped walnuts
1 tbs. butter (though walnut or canola oil would work too)
2 tbs. maple syrup
1/4 c finely chopped dates
dash cinnamon, ginger and nutmeg
pinch of salt

Melt the butter in a skillet over medium heat and mix in the maple syrup. As soon as those are well mixed add the walnuts and saute them briefly (1-2 minutes). Add the rolled oats and stir to mix well. Sprinkle on the spices and stir so they are mixed evenly. Remove from heat, mix in the dates and then spread it on a cookie sheet to cool.

I like to give it 10 minutes to cool, but if you are in a real hurry you could pour cold milk on it and eat it sooner. The big thing is to make sure you don't burn your mouth on the hot sugar. This is one of my favorite treats, I hope you will try it too. You can also use honey, agave syrup, molasses or a mix of water and brown sugar as the sweetener and use any combination of seeds, nuts, spices and dried fruit that appeals to you. Enjoy!

ETA: This is now linked to Pennywise Platter. Check out the link for other tasty, frugal, healthy recipes and ideas.

Thursday, August 12, 2010

Pasta Salad

A's sleep schedule has been really weird lately. She used to consistently take 2 naps ranging from 1.5-2 hours each. This meant that DH would come home for lunch right after she woke up and we could have a nice family lunch and some play time before he headed back to work and we got on with our afternoon. Unfortunately, she is now switching to one longer nap right smack in the middle of the day. Gone is the family lunch unless we can managed to eat really late or really early. A late lunch works okay, unless we have plans for the afternoon in which case we can't get anywhere before 3 or 4. Then I had an idea, we'll have a family picnic. There is a nice, shady park close to DH's work and if I have lunch ready before A. wakes up from her nap we can go eat lunch together, drop him back at work and make it to our activities. Unfortunately, I came up with this idea after she was down for her nap and we didn't have sandwich makings in the house so I needed something else that would make good picnic food and be baby friendly (she eats what we do). I thought of pasta salad, but none of the recipes I found fit what we had so I had to get creative. Here is what I came up with, it has the added advantage of letting me use up some of the veggies from our CSA share, feel free to add whatever veggies you have on hand. You could also cook dried kidney beans for the salad which is much cheaper (and healthier) than canned, but it takes thinking ahead. This makes a giant batch so we will have plenty of left-overs for quick snacks and lunches later in the week. Enjoy!

1/2c olive oil
1/2c red wine vinegar
1/4c canola oil (or more Olive Oil)
1tsp. oregano
2 cloves minced garlic
1tbs. sugar
1/2tsp. salt
8oz uncooked pasta (bowties or spirals work well)
1 red onion
1 bell pepper
1 can kidney beans
2 medium zucchini
other veggies (optional)
1oz. crumbled feta
salt and pepper to taste

1. Cook the pasta according to the package directions. 2. Meanwhile, in a large mixing bowl, whisk together the oil, vinegar, oregano, garlic, sugar and salt. 3. Chop the onion and dice the bell pepper and add them to the dressing. 4. Add the cooked pasta to the dressing and stir. 5. Chop the zucchini and any other veggies and add them along with the beans and the feta. 6. Give everything a good stir and refrigerate it at least an hour, though preferably overnight. 7. Add salt and pepper as needed to correct the seasoning right before serving.

Thursday, July 22, 2010

Easy Fresh Salsa

When it comes to tomatoes "our cup runith over" of late. I love tomatoes as much as the next person, but we have been getting two baskets of tomatoes from our CSA for more weeks than I can remember now. These are great sauted with squash and some onion and served over pasta. I love them eaten fresh both in salad and on their own. However, there is a limit to everything. If I had more I would can them, but we never get enough at one time to fire up the canning pot. Then I saw the post on Food in Jars about making homemade salsa. We had a big bag of chips to go with our summer favorite of tomatillo salsa so this pico de gallo is perfect, or would be if I had all the ingredients. Since necessity is the mother of invention I fit the recipe to work with what I had on hand. Here's what worked for me:

I used:
1 pint of tomatoes (this is how our CSA tomatoes come, just visualize how many would fit in a pint basket)
1/2 a small onion
1 small handful of cilantro (in a real pinch fresh parsley could be used)
salt and pepper to taste
lemon juice
Chop up each ingredient and put it into a wide mouth quart jar. Once everything is in there put on the lid and shake it to mix everything together. Let it stand in the fridge for a few hours for the flavors to meld (or as long as you can stand if a few hours are out of the question). Enjoy!
A few notes. You may have noticed that I didn't add any sort of chilies. I like my pico de gallo to be really mild, if you don't you might want to finely chop a chili like a serrano or a jalapeno and add it depending on what you like. This is especially important if you use parsley either because that is what you have on hand or because you are one of the unfortunate souls for whom cilantro tastes like metalic soap. Also, I used lemon juice because that's what I had, if you have it lime juice would work better. Finally, I didn't add garlic because we'd just run out. If you have garlic you might want to add that too.

Try making this salsa, it is a quick, easy and tasty way to use up some off those overly abundant summer tomatoes. The best part is that as long as you don't go crazy with the chips it is pretty healthy too since it has no fat and is just fresh veggies. It is also cheap because it uses foods that are frequently in season at the same time and is a great alternative to store bought salsa.

This recipe is linked to Pennywise Platter at The Nourishing Gourmet. Head over there to check out other great recipes.

Tuesday, June 29, 2010

Coconut Milk Ice Cream

When my daughter was about 2 months old we realized that she had some food allergies. Since I was breastfeeding the solution was not as simple as just changing the formula we were giving her. I considered changing to formula, but we had just gotten the breastfeeding working well and I didn't want to have to deal with the hassle of washing bottles and mixing formula, nor did I want the expense of hypoallergenic formula if I could avoid it. I knew "breast is best" (though it can be really hard if you don't have good enough support) so I was determined to give it my best shot. I started by eliminating dairy and substituting soy. Some of the allergy symptoms got better, some worse. Then I stopped eating all dairy and soy. At this point I was really glad for our local Co-op. They had all kinds of things that I could eat that didn't contain dairy or soy. Cutting the diary and soy helped a lot, but there was something else that was causing problems too. After eliminating various foods for 2 weeks at a time we finally narrowed down the problem to corn. At this point I was ecstatic that I had already known about the local food network, the co-op, Trader Joe's, etc before hand, it made cutting all of these foods doable. By this point there were very few processed foods I could have so I was stuck making almost everything from scratch. By this time I was having to watch everything I ate and answer a lot of people who kept asking "why not just switch to formula?" However, if you have ever looked at the ingredients on a can or bottle of formula you might know the reason. Almost every formula on the market in the US contains dairy, soy or corn. Even the hypoallergenic ones will frequently contain corn. We only had one option for formula and it was a ready-to-feed formula that cost $10/quart. Since most babies go through this much or more a day I was more than happy to cut my diet quite a bit to keep on breastfeeding.

I won't lie and say it was easy to do this, but there were some definite silver linings. The best thing was that since I could no longer eat most processed foods and had to watch what I was eating closely to make sure I got a good nutritional balance I was eating WAY healthier than I had been. This made loosing the baby weight while still feeling great a lot easier (I gained more than I want to admit here, lets just say there was a lot to loose and leave it at that). I also learned about a lot of great new foods and found some wonderful recipes. I would never have considered some of these things if my diet hadn't been so restricted, but now that my daughter has grown out of her allergies I still eat them because they are so good. One of these amazing foods is coconut milk ice cream. I found it at the co-op, but I've been told that they carry it at places like Whole Foods, Sprouts and Sunflower Market. This became my luxury. Anytime I was having a hard day or starting to feel like a martyr because I couldn't eat anything "good" I would sit down and have a little ice cream. While this didn't do much for my weight loss goals (and is probably why I still have a few pounds left), it did wonders for my spirit. My husband liked the coconut milk ice cream too, but before long we were going through a ton and it isn't cheap so for Mother's Day he got me an ice cream maker. Our basic recipe is super simple and quite tasty. It can be still-frozen in a pinch, but it is much better when churn frozen.

Coconut Milk Ice Cream
Mix:
2 cans coconut milk (full fat, not light)
3/4 c. sugar
1-2 tsp. vanilla extract (I use 1.5 tsp, DH likes 2)
Pour the mixture in your ice cream maker and let it do it's magic until this looks like ice cream. To make an extra special treat top with strawberries, peaches or anything else that you would normally put on ice cream.

There are a ton of other recipes for coconut milk ice cream on the web, but this is a super simple one to get you started. If you store the drum for the ice cream maker in the freezer and the coconut milk in the refrigerator you can make this in 30 minutes while holding a baby in one arm. (I swear, I've done it and it really is that easy.) If anyone else reading this is interested in these sorts of foods or is dealing with an elimination diet please let me know. I've got a ton of recipes that I'll happily share.

Thursday, June 17, 2010

Let's Jam

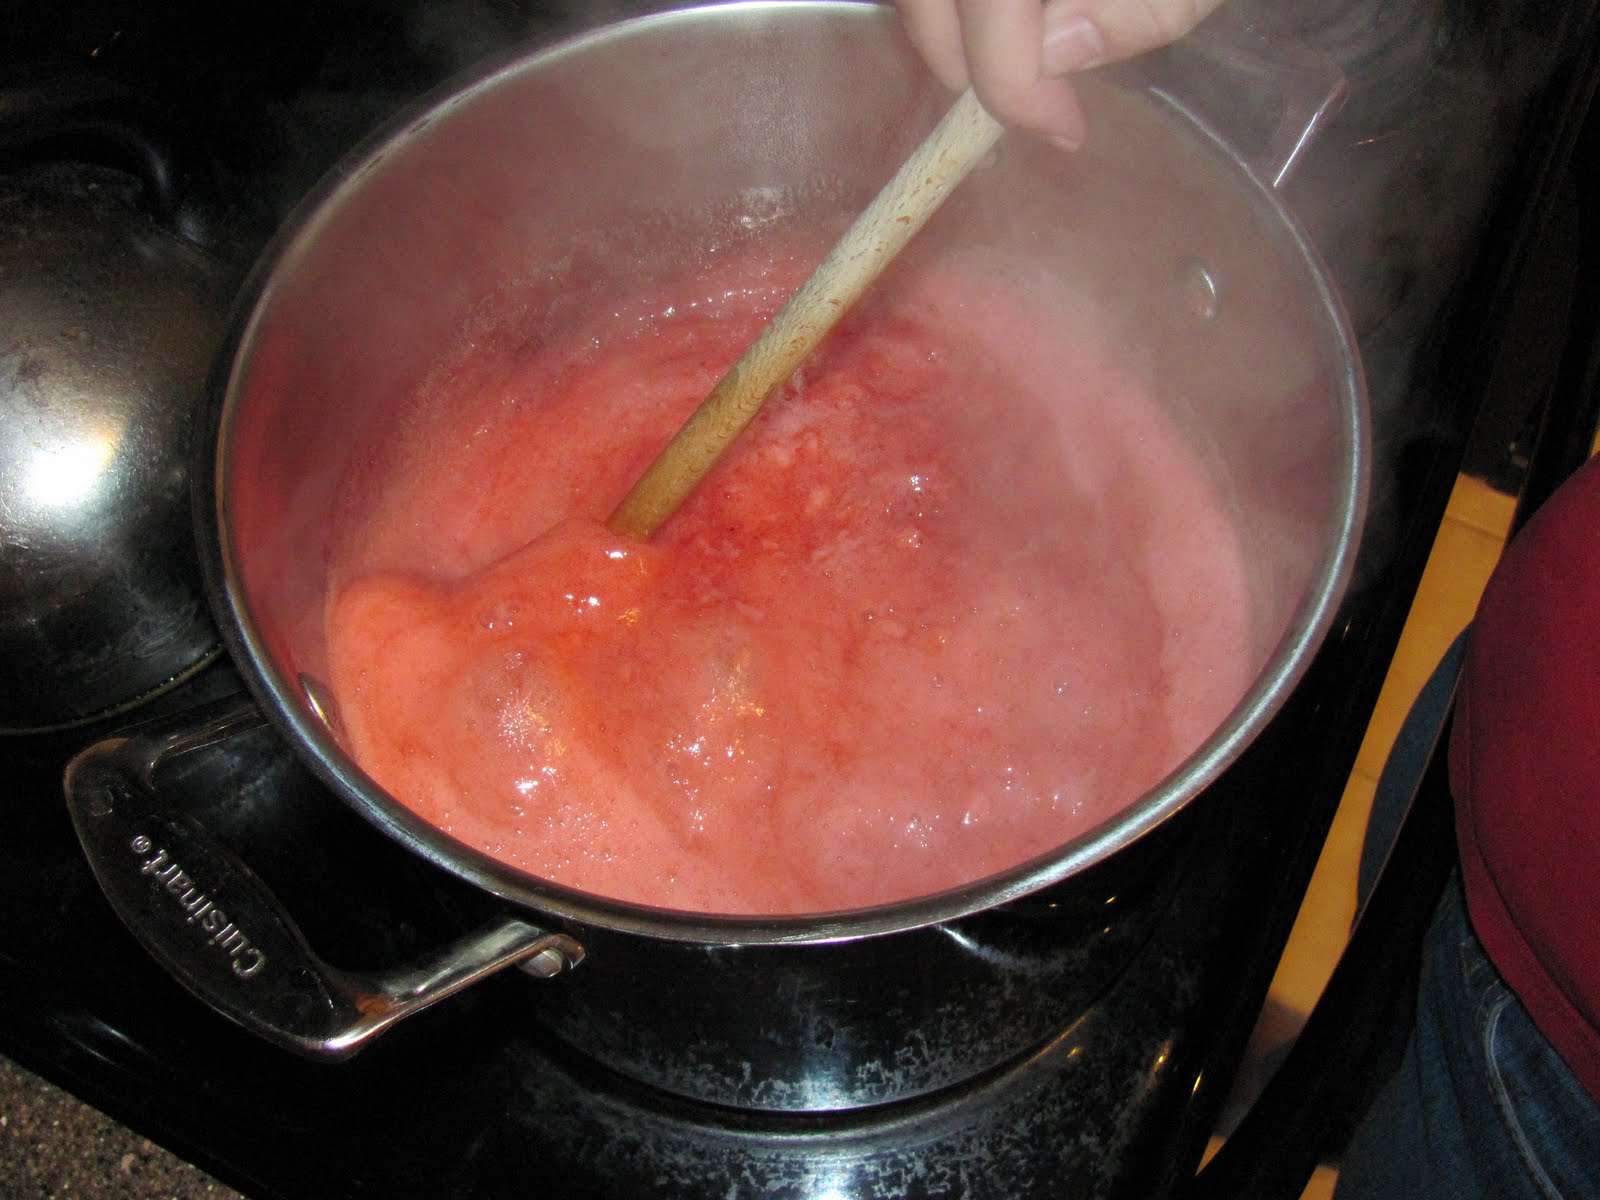
Strawberries are in season in many parts of the US. This means that they are cheap, plentiful and wonderful. If you want good produce that is affordable it is best to buy in season. In many cases when fruit is very plentiful you can find it at farm stands, produce markets and farmer's markets at amazing prices. Though if you are looking for a good deal at the farmer's market go towards the end and ask. That will be your best chance for bargain hunting. Last weekend we found some beautiful strawberries 4lbs/$1 and I knew it was time to make more jam. (This was my third batch this year, but it tastes good enough to be worth the work.) If you have never had homemade jam you really should find some to try. If you have had homemade jam you know how good it is, but do you know how easy it is to make your own? Here is a tutorial on the basics of how to make jam and can it using a boiling water bath. You don't even need a giant canning pot for jam, we use our 8qt. stock pot and a small rack that was part of a canning kit. It will fit 4 pint jars or 5 half-pint jelly jars which generally works quite well. This recipe makes 8 cups of strawberry jam and can be found in the pectin package. Hope the pictures help, sorry they aren't better, it was rather late.

You will need:
3-4 lbs. Strawberries
4 c. sugar
1 box no sugar needed pectin (Check the grocery store or near the jars at Walmart. Frequently they have canning stuff in the "food storage" section next to the gladware and such.)

1. Fill your canner (or in this case stockpot) about half full of water and start heating it. Also fill a tea kettle if you have one and heat that water in case you need to top up the water in the canner. You can do the rest of prep while the water heats, but you will want it to be hot before you start cooking the jam. (You can turn off the stove once it has boiled, just leave the lid on to keep the heat in.)

2. Wash, core and mash the strawberries. I do this 1 pound at a time. Keep going until you have 6 cups of mashed strawberries.

3. Measure out your sugar into a bowl. Then pour the pectin into a smaller bowl and take 1/4 c. of the sugar from your big bowl and mix it with the pectin.

4. Wash your jars and then leave them sitting in hot water. Since we will be processing them for more than 10 minutes you don't need to sterilize them. If you are making jelly you will need to sterilize them in boiling water. This is best done in the canning kettle since you will be heating the water anyway.

5. Set-up the stove so that you have everything you need because once you start jam goes really fast. I like to have my canning kettle on the large back burner so it is out of the way and use the large front one for making the jam. I set the sugar, pectin mixture, long handled wooden spoon and a timer on the side next to the jam. I set a wooden cutting board, soup spoon, custard cup, ladle, funnel, rubber scraper, jar bands and canning rack on the side next to the canning kettle.

6. Add the pectin mixture to the fruit, which should be in a 6-8 qt. pot. (I know this seams huge for the amount of fruit, but it makes it a lot easier to avoid burning yourself.) Heat while stirring constantly until it reaches a full rolling boil that cannot be stirred down. If the bubbles stop when you stir faster it isn't there yet.

7. Add the sugar and stir quickly until it returns to a full boil. Boil for 1 minute and then remove it from the heat.

8. Let it cool a minute or two while stirring and then use the soup spoon to skim the foam. I like to put the foam into a custard cup because once it is cool it is about the consistency of whipped yogurt and makes for a tasty treat. Plus it is easier for me.

9. Remove a jar from the sink, dry the inside (an assistant is really helpful for this part, but I've done it on my own too). Fill the jar 1/8"-1/4" from the top. Wipe the rim with a damp paper towel, set the lid on squarely and tighten the band. Set the jar in the canning rack and repeat until you are out of jam or your rack is full of jars, whichever comes first.

10. Put the canning rack into the canner (big pot) and make sure you have 1"-2" of water above the jars. If you don't have enough water, pour some hot water from the tea kettle in until you get to the right level. Put the lid on and return the water to a boil. Once the water is boiling you can start timing. You will need to boil the jars for 10 minutes if you are at sea level. If you are more than 1,000 ft. above sea level you will need to boil it longer. There is a chart with the pectin, but the general rule of thumb is to add 1-2 minutes per 1,000 ft above sea level. Once they have processed long enough turn off the stove, and pull out the jars. A set of jar tongs is helpful, but if you can pull the rack out without burning yourself you can get the jars from there. (Note, wet potholders WILL NOT do their job. They will conduct the heat straight to your hands and you may burn yourself. Please be careful and don't ask how I know.)

11. Let the jars cool overnight on a wooden cutting board, pot holders or anything else that won't conduct the heat away from them too fast. You don't want a jar breaking after all this work. As they cool you will start to hear popping sounds which is the jars vacuum sealing themselves. Consider every "pop" a pat on the back for a job well done. Leave the jars overnight to cool and by morning they should all be sealed. If any didn't seal (hasn't happened yet, but it is always possible) you will know because the middle part will flex up and down. In this case put it in the fridge and use ASAP. Also, if you wind up with a partial jar just refrigerate it, probably won't seal anyway if your process it and this way you have an excuse to eat it faster.

12. Label the jars (a sharpie works great or you can get fancy with printed stick-on labels) and store in a cool dark place. We normally keep our jars boxes under our bed. Maybe not the prettiest place, but it works well and lets me stock up for winter which is important when you are trying to eat local. Plus, what else are you going to use the space for?

ETA: This post has been linked to Pennywise Platter.

Friday, May 28, 2010

Cottage Pie or How to Use Up Old Root Veggies

Last night we had this dish that my husband and I both love for different reasons. He loves that at it's heart it is meat and potatoes with some veggies thrown in for color. I love that it is an excellent way to clean out the refrigerator. I discovered it when I needed to make a hearty dinner and we didn't have much in the house beyond our CSA share and a pound of ground beef. The original recipe is here, but I modified it quite a bit based on what we had in the house. Here is my version, hope you like it.

Cottage Pie

2c beef broth
1-2 lbs potatoes (red skin are best, but anything will work)
1 tbs. oil
1 bunch green onions, shallots, or a normal small onion
1 lb. ground beef
1/2 c. chopped carrot
1/2 c. frozen green beans/peas/corn/other veggie
1 tsp. Worchestershire Sauce
1 pinch chili flakes
salt and pepper to taste

Preheat your oven to 350. Chop up the potatoes and boil them in the broth. Meanwhile chop the green onions separating the white part from the green part. Heat the oil and saute the white part of the onion in the oil. When it is translucent add the ground beef. Brown the beef and then drain out most of the fat. You don't have to be super careful because a little won't hurt the flavor of this at all. When your potatoes are tender pour about half of the liquid into the pan with the beef (leave the other half in the pot) and add the veggies, Worchestershire sauce, chili flakes and salt and pepper to the beef mixture. Put the pan back on the stove over medium heat and let it get all warm and bubbly. Once it is bubbly pour it into a 2 qt. casserole dish. Meanwhile mash the potatoes with the other half of the broth. They should be like runny mashed potatoes. Stir in the green onions and put the whole thing in the casserole on top of the beef. Bake in the oven 30-45 minutes or until the potatoes are starting to brown up nicely and everything is hot, bubbly and smelling amazing. Pull it out and let it cool a couple minutes so you don't burn yourself and you are done.

If you want to be fancy you can serve it with a green salad, but if it has been a busy day and you're tired don't feel bad serving it as is. You have your meat, veggie and carbs all in one dish. If you have extra veggies feel free to throw them in, the amounts I list are really the minimum. My favorite part of this dish, other than using up lots of stuff out of the fridge, is that if the baby wakes up or I suddenly need to do something right as it is finishing it can be left in a warm oven for quite a while and still be quite tasty.

Try it, I hope you like it as much as we do.